
-
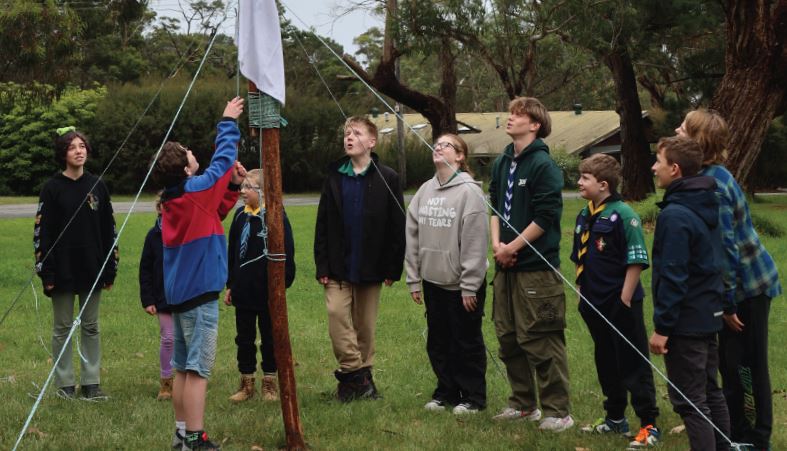
Fly the Flag
Knots, Lashings, and Pride: The Flagpole Challenge!
Raise your skills to new heights with 'Fly the Flag'! Scouts will learn to build their own flagpole using pioneering knots and lashings, then hoist a flag with pride. This activity combines creativity, teamwork, and practical skills, making it a rewarding and memorable challenge.
Before you begin
- To raise a flag, you need a flagpole. In this activity, everyone will build their own flagpole using a range of different nautical knots to be used to hoist the colours.
- The lashings and knots in this activity could be explored as a group together, or as separate bases to visit when working in smaller groups. The person leading the activity should take a look at the example knots and lashings in this activity, practise them and check that they understand how they’re done. The group could also use devices with internet access to take a look at tutorials during the activity.
- Set up areas for everyone to try out each lashing, making sure there’s enough rope and spars (poles used in pioneering). Pencils, bamboo sticks, staves and broom handles can all be used instead of spars. Make sure whatever objects you use are a suitable size and weight for your group. These instructions are based on using 5ft broom handle-style poles. Adjust the dimensions accordingly to suit the materials you’re using.
What you'll need
-
Rope
-
Poles or staves
-
Tent pegs
-
10cm x 1cm sticks
-
Access to the internet
Fly the flag
- Split into groups of four or five. Each group needs two poles, one 10cm x 1cm stick, eight lengths of rope and a flag with two string toggles. If you don’t have enough flags to go around, leave these out.
- Each group should place the two poles next to each other lengthways on the floor. The poles should overlap (touch) one another for about 30cm of their length, so that they meet in the middle. Tie the poles together at this point with two round lashings.
- For taller flagpoles, attach a third pole at one end with another overlap of 30cm. Use more round lashings to do this.
- Use square lashing to attach the smaller stick about one metre from one end of your flagpole, at a 90-degree angle. This serves as a cleat to attach one end of the halyard to. The end with the cleat will be the base of the flagpole.
- The ‘halyard’ is the name for a rope used to raise or lower the sail or flag on a ship.
- Take a short length of rope and use a bowline to create a short loop at one end. The loop should be a little larger than the thickness (diameter) of the rope you’re using.
- Attach this rope to the top of the flagpole (the opposite end to the cleat) using a round turn and two half hitches, letting the bowline loop hang down about 10cm from the round turn.
- The excess ‘loose’ end of the rope could be coiled, allowed to dangle or looped around the flagpole itself.
- Take a new length of rope, just under double the length of the flagpole, and pass one end through the bowline loop at the top of the flagpole. Holding the other end, tie a figure of eight on the flagpole about a metre from either end. This needs to be thick enough that it cannot pass through the bowline loop. You may need to adjust the loop to make it smaller.
- Secure the two ends of the second length of rope together with a sheet bend. This should form a large loop running about half the length of the flagpole. This will be the halyard.
- Between the sheet bend and the figure of eight knots, attach the two toggles of the flag to the halyard using two rolling hitches. Make sure the upper rolling hitch faces up and the lower rolling hitch faces down.
- The rolling hitch is only effective when pulled in one direction. Facing these hitches up and down allows them to pull the flag up or down, depending on whether the halyard is being raised or lowered.
- Just above the round lashings on the flagpole, attach four guy ropes with a round turn and two half hitches on each.
- Tie a bowline around the end of each guy rope, leaving a loop that’ll fit around a tent peg. These will be needed if you’re standing your flagpole up at camp.
- To stand the flagpole up, upend the pole with the cleat at the bottom. Peg out the guy ropes and fix them evenly around the pole, making sure the ropes are taut as the pegs are planted.
- Wrap the loose end of the halyard around the cleat on the flagpole to secure it. Now you can raise the flag by untying the halyard from the cleat and pulling down on the side without the flag. This will raise the flag up the flagpole until the figure of eight hits the bowline, stopping the flag at the top. Secure the halyard to the cleat to hold the flag in place. The flag can be lowered by doing the opposite.
Knot uses
Knots have different uses for different activities and sports. These knots are commonly used for nautical activities, but they may have other uses:
-
Figure of eight: A great stopper knot that doesn’t bind.
-
Clove hitch: Used as an adjustable fastening to initially position hanging objects like boat fenders or other lashings. Can then be replaced with more secure fastenings. The clove hitch can also be tied in the middle of the rope, and is used as the start of many lashings.
-
Round turn and two half hitches: Quickly secures a rope to a post or ring.
-
Sheet bend: Joins two ropes of similar size.
-
Rolling hitch: Attaches one rope to another when the line of pull is almost parallel. Can be used to take strain off of a rope to remove, replace or repair it. Also used for hauling light objects.
-
Bowline: Creates a loop in the end of a rope that’s secure but easy to untie, and could be used to fasten a mooring line. Cannot be tied or untied under tension.
Change the challenge level
Step your flagpole up a little by adding a horizontal yardarm of a diagonal gaff to more closely replicate a traditional nautical flagpole that you might see on a ship.
This activity can be scaled down and completed with broom handle-sized poles and twine, or even smaller objects like pencils with thread. Practising knot skills doesn’t have to be done on a large scale.
Consider different projects you could try with these nautical knots that may be better suited to your group.
Reflection
Building your own flagpole can be extremely rewarding and could one day help you out of a sticky situation too. This is far more resourceful than going out and buying a flagpole, as you can take the flagpole apart again when it’s not needed, and it can be designed to be exactly the right size and shape for your space. Making a flagpole like the one in this activity can save money too.
The world around us is filling up with more and more things that are only used once or twice before being thrown away, or things we cannot repair so have to replace. Though they might be basic, designing and building your own pioneered projects, like the flagpole, can help show us all that sometimes we should think twice about what we buy, use and waste, and consider whether there’s a more responsible and satisfying alternative.