


Engineering Without Ties
Introduction
Leonardo da Vinci was a famous artist, scientist, and engineer who designed a self-supporting bridge that holds itself together without any ropes, nails, or glue. This activity challenges Scouts to build their own Da Vinci Bridge using paddlepop sticks or larger wooden spars.
Scouts will learn about structural forces, friction, and engineering design while testing how strong their bridges are. The best part? If built correctly, the bridge can support weight and even be scaled up to life-size!
This activity also links to Outdoor Adventure Skills (OAS) Bushcraft Stage 5 – Pioneering, which includes constructing a no-rope bridge.
What you'll need
For a Small Model:
- Paddlepop sticks
- Skewers (optional for extra support)
- Markers (optional for colour-coding)
- Weights (e.g. books, small objects to test strength)
For a Full-Scale Bridge:
-
- Wooden spars (thicker poles or logs)
- Adult supervision
- At least two people per spar to lift and place them safely
Before you begin
-
Discuss with the Unit:
- How can a bridge hold itself up without nails, glue, or rope?
- What forces (e.g. tension, compression, shear) help keep a bridge strong?
- Where do we see self-supporting structures in real life?
-
Decide on the scale of your bridge:
- Small model: Use paddlepop sticks or skewers
- Larger version: Use wooden spars and teamwork
-
Prepare for multiple attempts – This bridge might take a few tries to get right!
Activity
Step 1: Build the First Section
-
Lay four sticks in position:
- Two horizontal (base layer)
- One slash stick over the top
- One cross stick underneath
-
Start weaving the structure:
- Slide two new sticks under and over existing sticks
- Keep pressure on the structure to hold it in place

Step 2: Extend the Bridge
- Continue adding sticks following the same weave pattern
- Hold the bridge flat while building—it will rise as you add more sticks
- The slash and cross sticks should alternate as you go
Step 3: Test the Strength
-
- Gently release the bridge and observe how it holds itself together
- Add weight (books or small objects) to test how much it can support
- If it collapses, adjust the positioning and try again
Tips
It often helps to slide the new stick in at an angle to start with.
Notice the bridge starts to lift off the surface as soon as you add the blue sticks. Continually hold the bridge flat while you add new sticks, this will allow you to more easily add sticks without worry of your bridge tipping over/falling apart.
Once you understand the pattern you can keep the bridge going further. Notice how the “slashes” and “crosses” alternate, and the horizontal red and blue sticks follow a pattern. Reds always go under “slashes” and over “crosses”, where blues always do the opposite, over “slashes” and under “crosses”. Look at the photos below and you’ll notice they also repeat a pattern of “in between,” ”inner” and then “outer”. (We’ve labelled the first image to make this clearer.)
Change the challenge level
Easier:
- Use pre-marked or coloured sticks to guide placement
- Work in pairs to help with construction
- Focus on making a small model instead of scaling up
Harder:
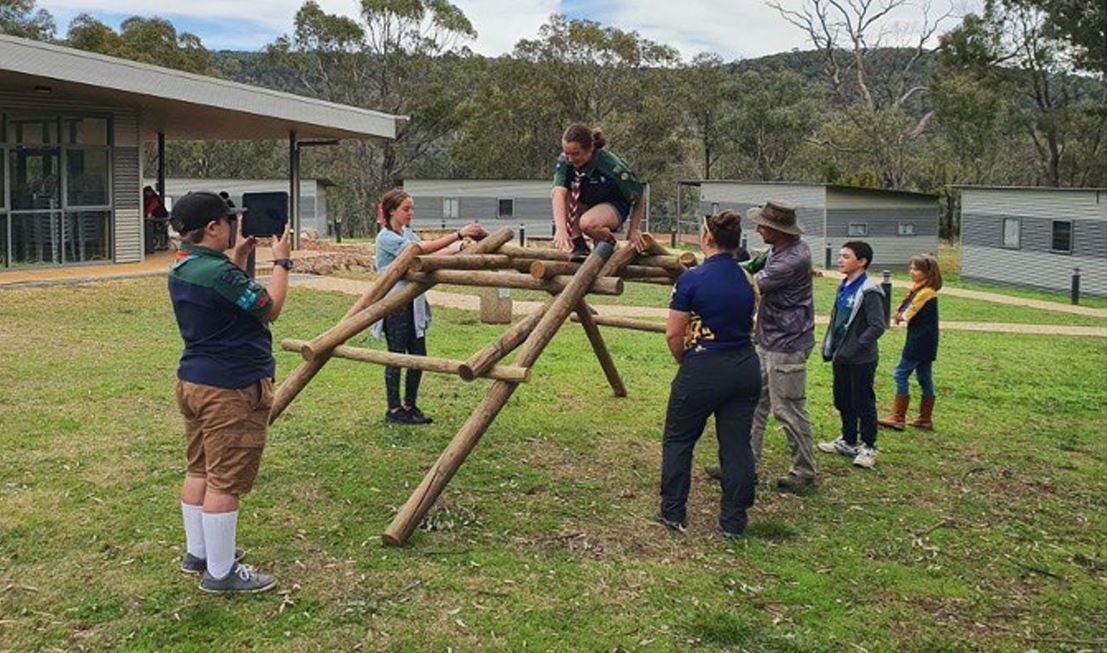
- Scale up to a life-sized bridge using wooden spars
- Experiment with different materials (e.g. thicker or flexible sticks)
- Increase the span of the bridge to see how long it can be made
- Test different weights to find the breaking point
Reflection
- Did the bridge hold together as expected? Why or why not?
- How did friction and force help keep it stable?
- What was the most difficult part of construction?
- If you did this again, how could you improve the design?
- Where else could this type of engineering be useful in real life?